
I love the lattice pattern of the Love Letters paper, and started by cutting it out with an X-acto knife, then used the pattern on the background Signature paper dictate how I trimmed the lattice. I wanted to leave the lovely birdcage and doily in the bottom right and the flowers and flourishes in the top left corners visible.

I glued the lattice down, then applied all my media overtop to make it an organic part of my background. Lots of layers here - misting with 13 Arts and Lindy's Stamp Gang mists, masking with 13 Arts Texture Paste, stamping, and some added texture with Shimmerz Texturez in Patina and Artie-Choked.
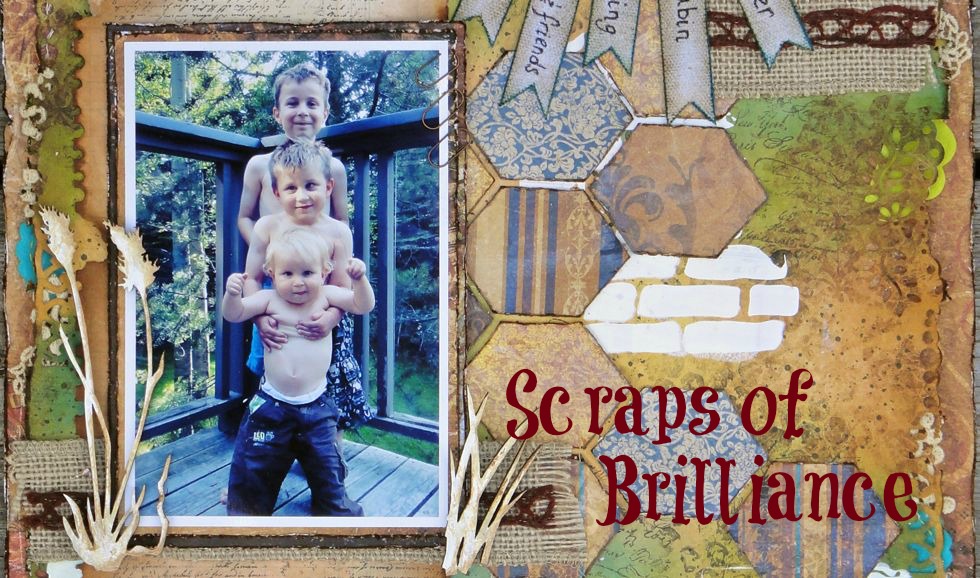
Lots of Blue Fern Studios chipboard scattered throughout. Frames are a great way to highlight a focal point on your photo; here I printed a second copy of the photo and fussy cut my youngest son Colby and the swing out of it and adhered it over the frame to bring movement to the picture. Of the three of us in the picture, there is no doubt who is the focal person (even more helpful when the photo is not particularly flattering of my eldest son and I). I started by rubbing a candle on the chipboard to create a bit of a resist, then painted and splattered on various coordinating colours of watercolour paints for a fun, artsy feel.

In addition to the lattice, there are lots of layers of paper and media on my background. I didn't want to cover these completely with additional layers of paper, but did want to add some additional bulk behind the photo; the Shabby Brick Bits were ideal for this purpose, and grounded the photo and cluster while allowing the background to peek through. I simply painted the chipboard with two coats of gesso, then added stamping and splattering.

Your chipboard doesn't always have to be the focal point of your layout. I needed a little something to bulk up my cluster, and this butterfly, painted randomly with watercolours, fit the bill perfectly.

With such a busy background, I wanted to make my title bold and simple to help it really stand out. A simple coat of black watercolour paint did the trick. I mounted the title on top of the flowers in my cluster with some wet adhesive.

Products Used
- Blue Fern Garden Signature paper
- Blue Fern Garden Love Letters paper
- Blue Fern Garden Calling Cards paper
- Shabby Brick Bits chipboard
- Picture Perfect chipboard
- The Optimist Word Set chipboard
- Icons Set One chipboard
Thanks for stopping by today! It's a holiday here for us in BC (Family Day), so we are enjoying an extra family day. I got my first ski day of the year in yesterday, and am hoping to get in a recuperative spa day today ;) It is also my beautiful younger sister's birthday, and if anyone should have a provincial holiday to celebrate her birthday, it's Emily.
No comments:
Post a Comment